
Spin Brake Repair Procedures
Read the following repair procedures and decide if you could successfully replace your transmission.
- Opening the cabinet
- Removing the tub assembly
- Removing agitator and basket
- Removing drive assembly and the old transmission
- Installing the new transmission and drive assembly
- Replacing the basket and agitator
- Replacing the tub assembly
- Closing up the cabinet
This page contains affiliate links. For more information visit our
FTC disclosure page.
- Visit our sponsor for parts:

Search
Removing the Tub Assembly
- Unplug the washer.
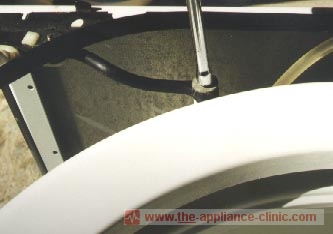
- (Figure 1) Remove the rubber suspendion straps in four places at each corner of the cabinet.
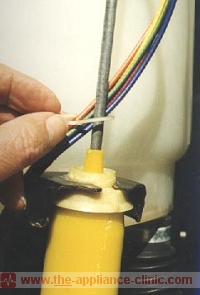
- (Figure 2) Remove the clip holding the motor harness to the suspension rod.
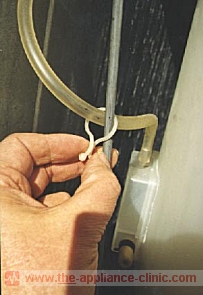
- (Figure 3) Remove the clip holding the fill switch tube to the suspension rod.
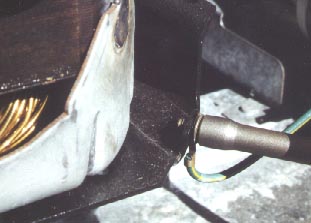
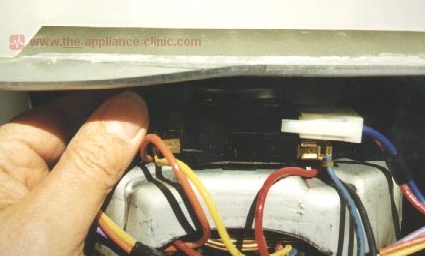
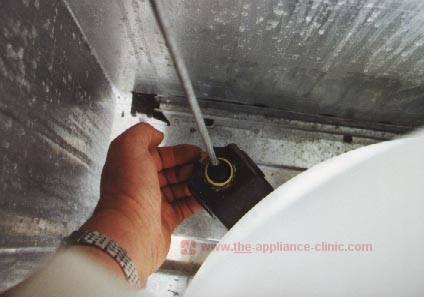
- (Figure 4) Locate the ground wire leading up to the lower right corner of the motor and remove the screw to disconnect it.
- (Figure 5) Locate the clear plastic hose coming down the left side of the tub and disconnect it from the air pressure dome.
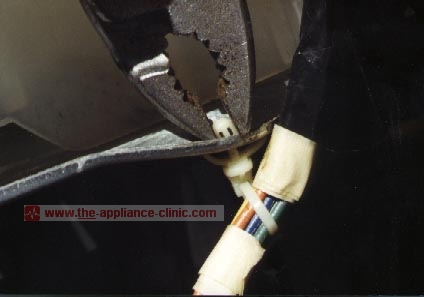
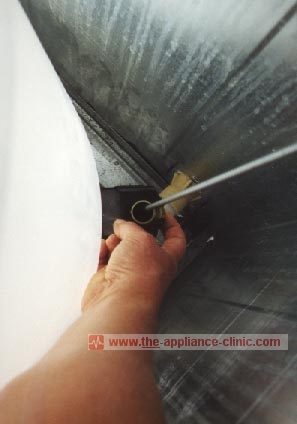
- (Figure 6) Locate the motor wire harness clip just above the motor.
- (Figure 7) Pinch the clip fastener to release the clip and wire harness from the motor mount.
- (Figure 8) Locate the white and black motor connectors on top of the motor on both sides and then pinch them to remove.
- (Figure 9) Use a channel lock pliers to open the clamp securing the drain hose to the water pump and slide it back so that you can remove the hose.
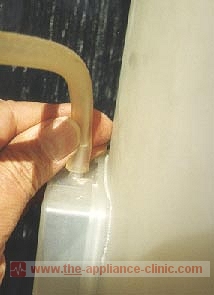
- (Figure 10) Remove the left front suspension cylinder by prying it out of its slot with a screwdriver.
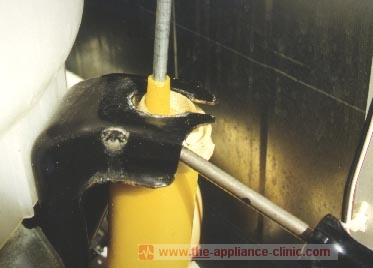
- (Figure 11) Remove the left rear suspension using the same technique.
- (Figure 12) And now remove the right rear suspension.
- One last time - remove the right front suspension cylinder.
- Now you should have your suspension completely removed.
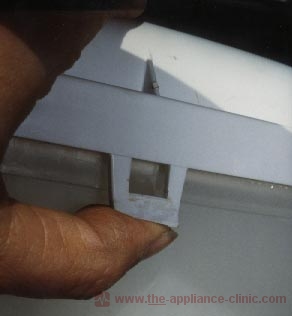
- (Figure 13) Release the tub top ring by pushing down over each of the tub hooks and pulling out on the tabs until the tub top is loose. Set it aside.
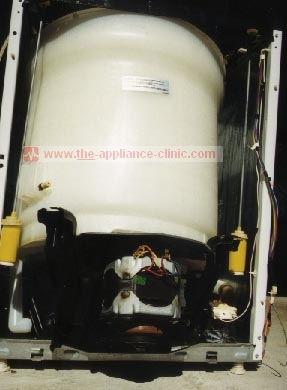
- Everything has been disconnected from the tub assembly and it is now ready to be taken out.
- (Figure 14) Rock the top of the tub assembly back and slide the bottom over the bottom cabinet rail.
- (Figure 15) Now the tub assembly is out of the cabinet.


Click the banner to visit our sponsor to purchase parts:
